A while back, when my stash was small, I decided I wanted to display my stash. I looked all over and could only find wall racks that were expensive. I believe for one rack it was $80 shipped. I was not going to pay that much for a bunch of plastic. I decided I'm a smart girl I can figure out how to build my own wall racks. I had shop class in school. I'm capable. All the materials cost me around $20.
This is honestly a very simple project. I wouldn't say I'm handy at all.
Lets get started.
Please make sure to follow all safety precautions, wear a mask, you don't want to breathe in saw dust. Also please make sure you wear safety glasses. Yeah you'll look like a dork but you'll be a dork that doesn't have saw dust in her eyes :)
For all my wall racks I used three 1"x2"x8'
I also used a sheet of 5.2mm 2'x4' lauan plywood
You want to start with the 1x2's and cut 2 pieces the length you want them to be for how tall your wall rack will be. I will be honest, math is NOT my strong point so I like to use simple numbers. I chose to make my wall rack 36" tall. Then you need to decide how wide you want the wall rack to be. I wanted mine to be 21.5" wide BUT you need to subtract the width of the 2 1x2's so 21.5" - 1.5 " (each 1x2 is .75" wide) this will ensure your wall rack comes out to be the right size. My shelves will each be 20" long. To clarify I cut two pieces to 36" and nine pieces to 20".
please be careful when using power tools!!!
Now you'll need to assemble your top, bottom. and sides. You'll lay the sides down first then slide the top in between the sides. you'll want the 2" side to be the depth of the wall rack, so the 1" side will be facing towards you. Nail or screw the top and the bottom into place.
you just built yourself a rectangle :D
Inspector Jeffery says it's looking good
Material Manager Jaxie guards the pieces that will become shelves
Project Manager Joey says measure twice, cut once
Next you want to measure out the placement for the shelves. I didn't care too much about them being totally even. In fact I like having the top or bottom shelf a little larger in case I need to store and odd sized polishes. I chose to make my shelves 4.25" apart measuring from the bottom of the wall rack I made a mark at 4.25"
I marked on both sides of the wall rack and used a level to make sure it was even. I then nailed the shelf into place using two 1 5/8" nails on each side. I then measured 4.25" from the bottom of that shelf to make the place for the next shelf. I continued nailing shelves into place.
Here's what it looks like with all the shelves in place
You're almost done!
The next step is to cut the lauan plywood to size for the backing. I have found the easiest way to do this is to lay the rack on top of the plywood, make sure the sides are flush to the edge of the rack and use a pencil to mark where you're going to cut. Using a table saw I cut the plywood. I sanded the edges just so they weren't sharp then I nailed the plywood to the back of the rack. This will make it more sturdy.
I took the rack outside a spray painted it. You could cover the back with fabric and paint just the rack part then assemble the rack to the back if you'd like.
I let the painted wall rack dry for two days in the garage so my house didn't smell like spray paint. Then i hung it up. Make sure you drill into wall studs. polish is very heavy and you need the support of the studs to hold the weight. If you cannot drill into studs make sure you use wall anchors.
you just built your very own polish rack! Now fill it up will all your pretties!
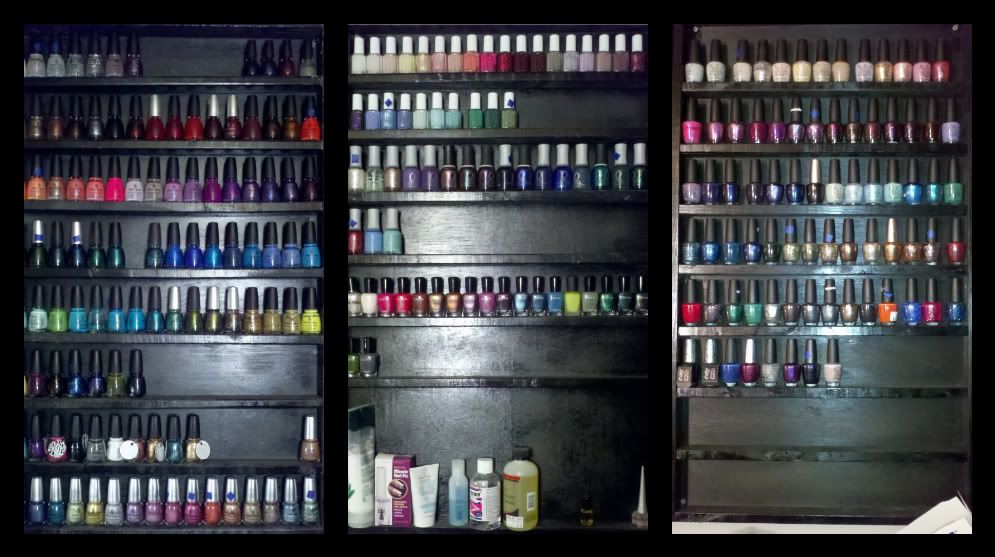
I currently have three wall racks. Here is a picture of them
on the left is all OPIs. The middle top shelf is Essie, below that are my Orlys and below the Orlys are my Zoyas. The Rack to the right is all China Glaze.
Here is the most recent picture of the racks. You can see I've reorganized the bottles. It's all about finding what works for you.
If you're wondering what all the blue squares are on the handles, that's how I keep track of my untrieds. Each untried has a little piece of blue painters tape on the handle that way when I'm deciding on a color I know which I haven't worn. After I've done a mani with that color I simply peel the tape off. I'm currently trying to work through my untrieds and I've found this method to be very helpful.
I hope you enjoyed this tutorial. Please feel free to ask me any questions you may have :)


I need to build something like this! Great blog!
ReplyDeletehttp://brittanyssecret.blogspot.com/
@ Brittany Elaine- I would love to see pictures if you do build one. Thanks!
ReplyDeleteCould you please make me one and I'll pay you to ship it to me and everything. I'm not very handy with things like this but I own over 200 bottles and I would love it if you coould do this for me . My email is msbrown042009@gmail.com please contact me
ReplyDelete