
Thursday, October 27, 2011
NOTD: OPI On The Same Paige
On The Same Paige was released back in 2009 with the Bright Pair Collection. On The Same Paige is a creme orange polish that leans more on the red side of orange. For me it's the perfect Autumn orange. Swatch shown is two coats topped with China Glaze Fast Forward Top Coat. On The Same Paige went on like butter,
NOTD: Frankenstein Mani
Hello everyone!
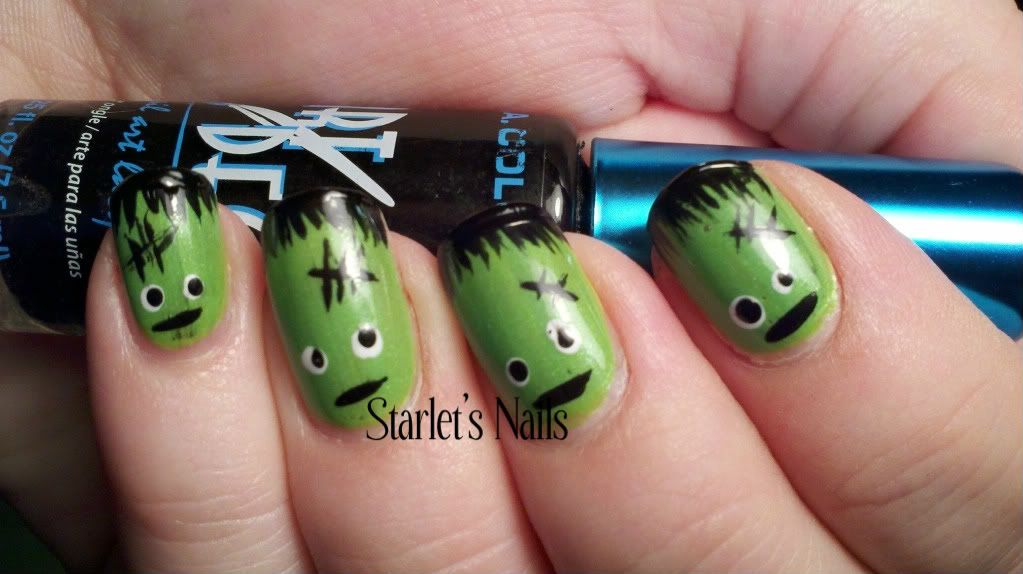
This is my take on the Frankenstein mani. I used China Glaze Tree Hugger as my base color topped with OPI's Zom-body To Love- it glows in the dark! I then used Wet n' Wild French White Creme and a dotting tool to make the whites on the eyes. The pupils of the eyes were made with and Art Deco nail art polish (the ones will the skinny brushes) and a dotting tool. I used the nail art polish brush to make the hair, stitches, and mouth. I let everything dry for a moment and topped it all off with a coat of Seche Vite.
This is my take on the Frankenstein mani. I used China Glaze Tree Hugger as my base color topped with OPI's Zom-body To Love- it glows in the dark! I then used Wet n' Wild French White Creme and a dotting tool to make the whites on the eyes. The pupils of the eyes were made with and Art Deco nail art polish (the ones will the skinny brushes) and a dotting tool. I used the nail art polish brush to make the hair, stitches, and mouth. I let everything dry for a moment and topped it all off with a coat of Seche Vite.
NOTD: Nails Inc. Magnetic Polish Trafalgar Square
Hello everyone!
Nails Inc recently came out with magnetic polishes. Can I just tell you how absolutely floored i was to see these? Ive been dying to get my hot little hands on some magnetic polishes since I heard Essence was supposed to release a magnetic line in the US back in May. Those polishes were released elsewhere in the world but never in the US.
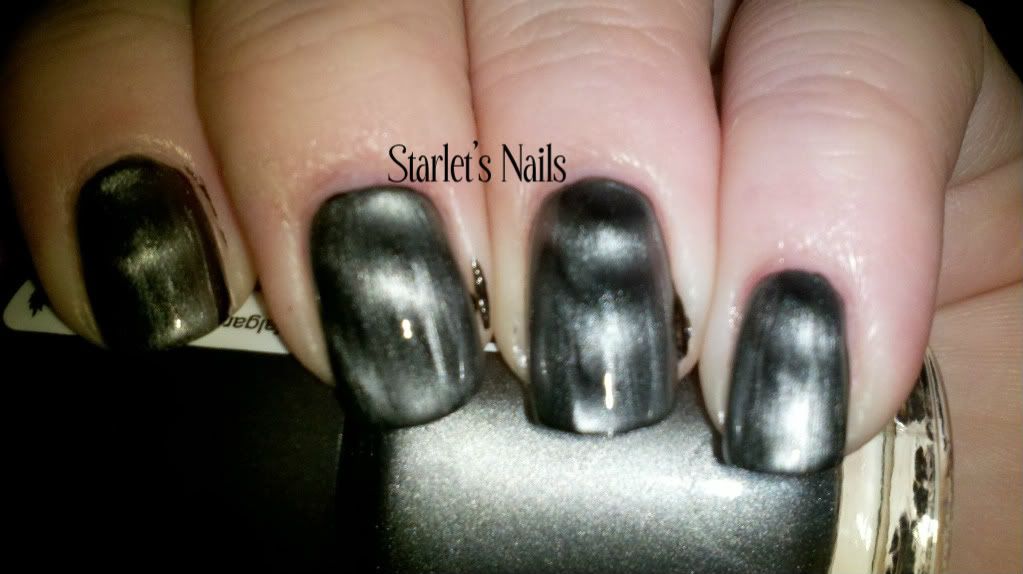
Trafalgar Square is a charcoal grey polish in the bottle but once you apply it and use the magnet it turns into a very dark grey if not black base and silver design. This is by far the coolest polish I've used. Watching the magnet work was really cool too. There is a little bit of a learning curve with these magnetic polishes.
Some things I learned are:
The Nails Inc. polish was purchased on Sephora's website. The magnetic polishes retail for $16 but to me they're totally worth it. Don't forget Sephora's Friends & Family sale is going on right now. Go to Sephora's Friends & Family sale page here and enter your email address for a code that gives you20% off your ENTIRE order. Don't worry about writing the code down, they'll email it to you also. If you use the 20% code you can pick up a Nails Inc. magnetic polish for $12.80 (plus shipping).
Nails Inc recently came out with magnetic polishes. Can I just tell you how absolutely floored i was to see these? Ive been dying to get my hot little hands on some magnetic polishes since I heard Essence was supposed to release a magnetic line in the US back in May. Those polishes were released elsewhere in the world but never in the US.
Trafalgar Square is a charcoal grey polish in the bottle but once you apply it and use the magnet it turns into a very dark grey if not black base and silver design. This is by far the coolest polish I've used. Watching the magnet work was really cool too. There is a little bit of a learning curve with these magnetic polishes.
Some things I learned are:
- Don't use too thick of a coat- the magnet can actually pull the polish off your nail
- I used a base color to use less product since these polishes are a little expensive
- The longer you leave the magnet over the polish the more pronounced the design is
- If you do not use a base color and you hold the magnet over the polish too long you will have thin/ sheer spots
The Nails Inc. polish was purchased on Sephora's website. The magnetic polishes retail for $16 but to me they're totally worth it. Don't forget Sephora's Friends & Family sale is going on right now. Go to Sephora's Friends & Family sale page here and enter your email address for a code that gives you20% off your ENTIRE order. Don't worry about writing the code down, they'll email it to you also. If you use the 20% code you can pick up a Nails Inc. magnetic polish for $12.80 (plus shipping).
Where The Heck Have You Been??!?!
Hello everyone!
I'm sorry my posts have been rather erratic. In October for the last three years I've worked at a haunted house as a makeup artist and actor on the weekends. I'm there again this year and between my normal job and the haunted house I am working seven day a week. Working so much doesn't leave me a lot of time for a life. My husband knows this all too well. Poor guy, I've only seen him a handful of days this month for more than a car ride or the amount of time my night time routine takes. I promise after this weekend (Halloween WOOT!) my posts will go back to normal. I have so much stuff planned and I'm also going to start doing posts in advance for when I';m on vacation in November and December.
I promise I have not given up blogging. I've just been running around like a chicken with my head cut off.
Tuesday, October 18, 2011
NOTD: Blue Feather Stamping
Hello Everyone!
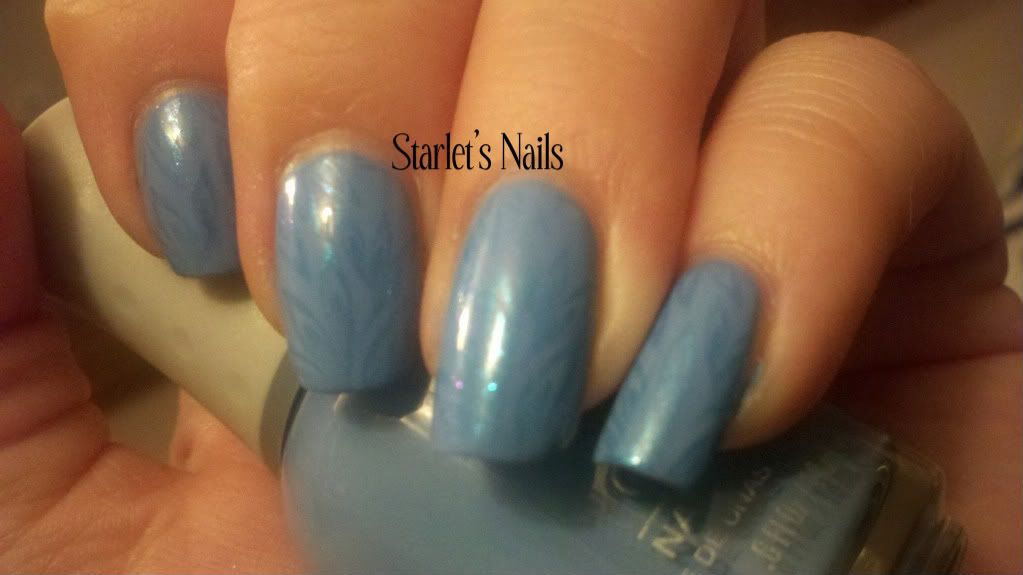
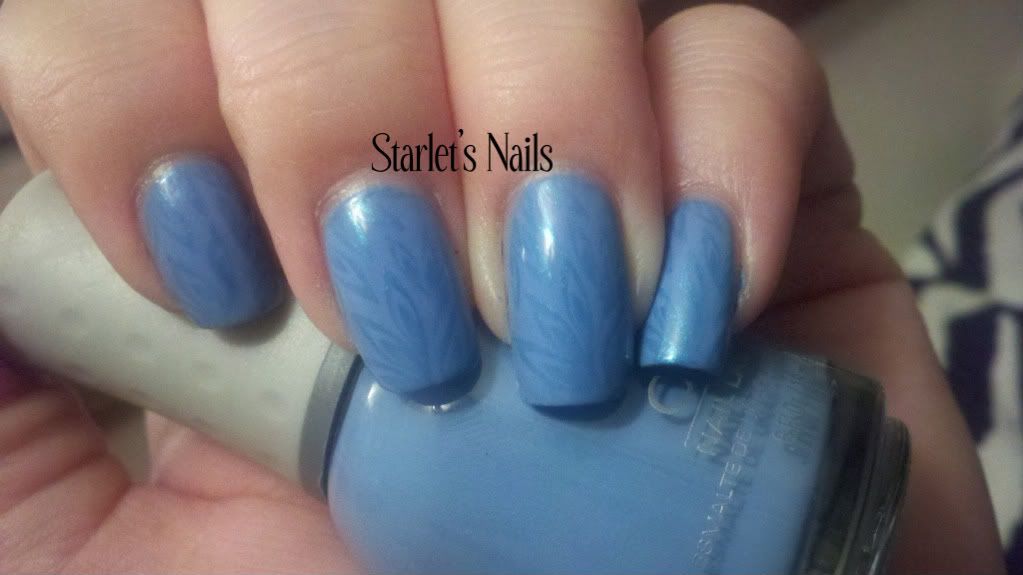
The NOTD I have for you this time is another stamping NOTD. I used Orly Snow Cone as a base and OPI Sea? I Told You as the stamping polish. I believe Sea? I Told You is meant for layering as it is very sheer. I used the feather design on my BundleMonster image plate BM-212. I really love how subtle the effect is. In the right lights you can see the duochrome on the feathers.
The NOTD I have for you this time is another stamping NOTD. I used Orly Snow Cone as a base and OPI Sea? I Told You as the stamping polish. I believe Sea? I Told You is meant for layering as it is very sheer. I used the feather design on my BundleMonster image plate BM-212. I really love how subtle the effect is. In the right lights you can see the duochrome on the feathers.
NOTD: OPI Fiji Weegee Fawn
Hello Everyone!
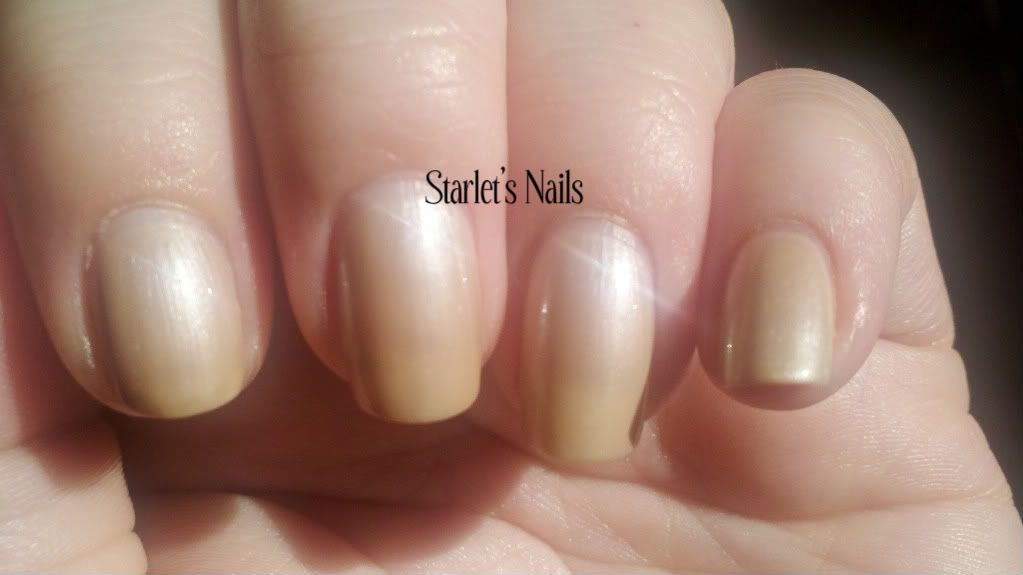
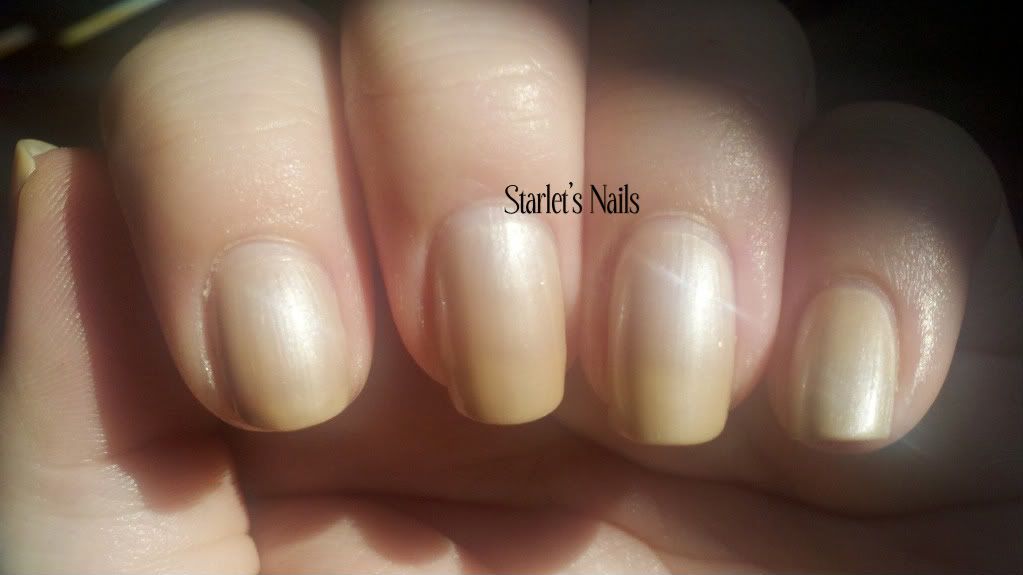
Today's NOTD is a polish of great significance to me. Fiji Weegee Fawn is the first OPI color I fell in love with. It is also the color I wore on my wedding day. I'm a dork and decided to wear it on our anniversary this year. Fiji Weegee Fawn is a little brushstroke-y but since the color means so much to me I can over look that.
Here she is:
Monday, October 17, 2011
Look At What I Found: Snowman Polishes
Hello Everyone!
It's that time of year again. Time for Blue Cross to release adorable polish bottles. For Halloween they have Jack-o-lantern polishes and for the Holiday Season they have snowman polishes. I had kind of a crappy day last week so I decided to cheer myself up with a few "cheap thrill" drug store polishes. I stopped by my local Rite Aid and to be honest I was looking for the Jack-o-lantern polishes but I stumbled on these cute snowmen.
This is what the display looks like.
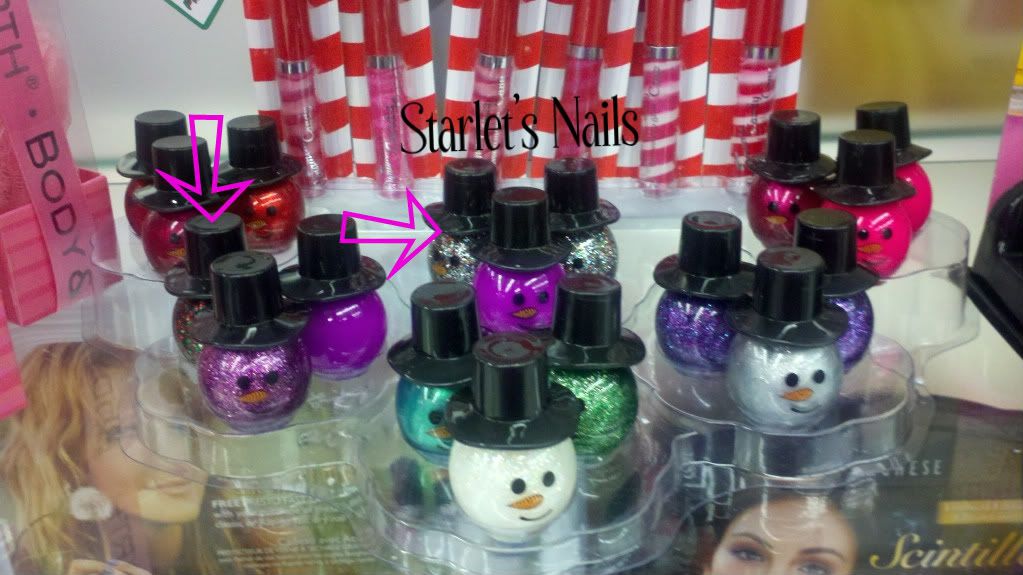
Note the pink arrows, those are the ones I picked up. The one on the left (the vertical arrow) is a red & green glitter, it looked like it might be bar glitter so it went home with me. The one in the back (the horizontal arrow) is a multicolored glitter. Glitter? Rainbows? Yep, you go in the cart too.
These cute little guys sell for $1.99 and can be found at Rite Aid.
It's that time of year again. Time for Blue Cross to release adorable polish bottles. For Halloween they have Jack-o-lantern polishes and for the Holiday Season they have snowman polishes. I had kind of a crappy day last week so I decided to cheer myself up with a few "cheap thrill" drug store polishes. I stopped by my local Rite Aid and to be honest I was looking for the Jack-o-lantern polishes but I stumbled on these cute snowmen.
This is what the display looks like.
Note the pink arrows, those are the ones I picked up. The one on the left (the vertical arrow) is a red & green glitter, it looked like it might be bar glitter so it went home with me. The one in the back (the horizontal arrow) is a multicolored glitter. Glitter? Rainbows? Yep, you go in the cart too.
These cute little guys sell for $1.99 and can be found at Rite Aid.
NOTD: Grey Halloween Skulls
Hello Everyone!
This NOTD is from awhile back. I got tired of summer colors in August so I decided to do a Halloween themed mani. For this mani I used two plates from the BundleMonster 25 piece set. I also used Love & Beauty (found at Forever21) Grey as the base color, Sally Hansen Xtreme Wear Concrete with BundleMonster image plate BM-201 for the background image and Zoya Kelly with BundleMonster image plate BM-211 for the skull.
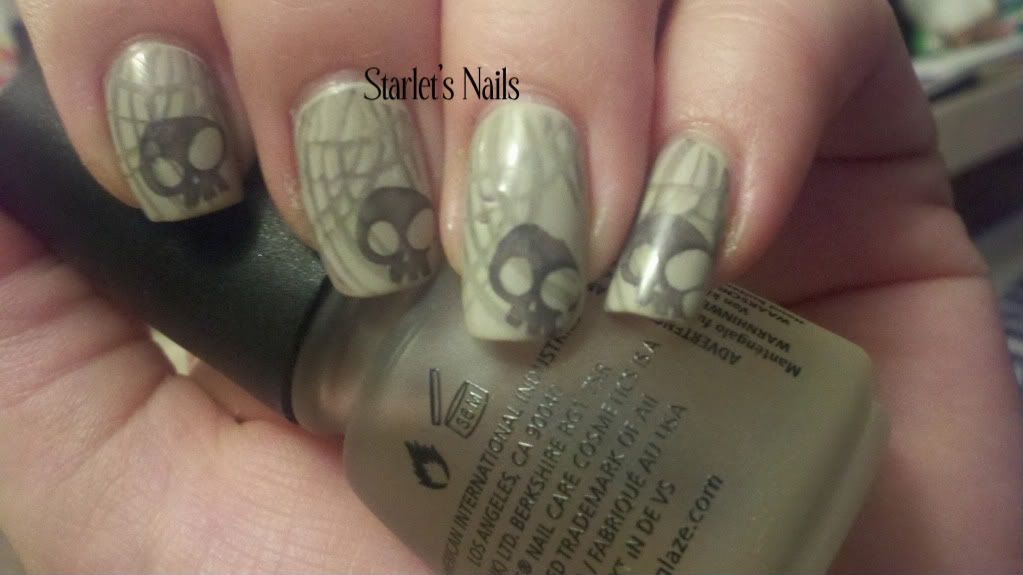
This NOTD is from awhile back. I got tired of summer colors in August so I decided to do a Halloween themed mani. For this mani I used two plates from the BundleMonster 25 piece set. I also used Love & Beauty (found at Forever21) Grey as the base color, Sally Hansen Xtreme Wear Concrete with BundleMonster image plate BM-201 for the background image and Zoya Kelly with BundleMonster image plate BM-211 for the skull.
I purchased my BundleMonster image plates from Amazon. They're truly a fantastic deal but if you're new to stamping please note they do not come with a stamper or a scraper.
NOTD: China Glaze Fortune Teller
Hello Everyone!
Today's NOTD is China Glaze Fortune Teller. I originally missed out on this beauty because it was released back in 2009 right before my polish addiction started and before I learned my lesson about limited edition products. I was lucky enough to get my hands on it. The picture shown is one coat of China Glaze Liquid Leather ( my go to black) and one coat of Fortune Teller. I used Liquid Leather as a base because I want to get the most out of my bottle of Fortune Teller. Fortune Teller would be opaque in two coats but with HTF polishes I prefer to layer them over a base color. I added China Glaze Matte Magic top coat and to me it looks like lava.
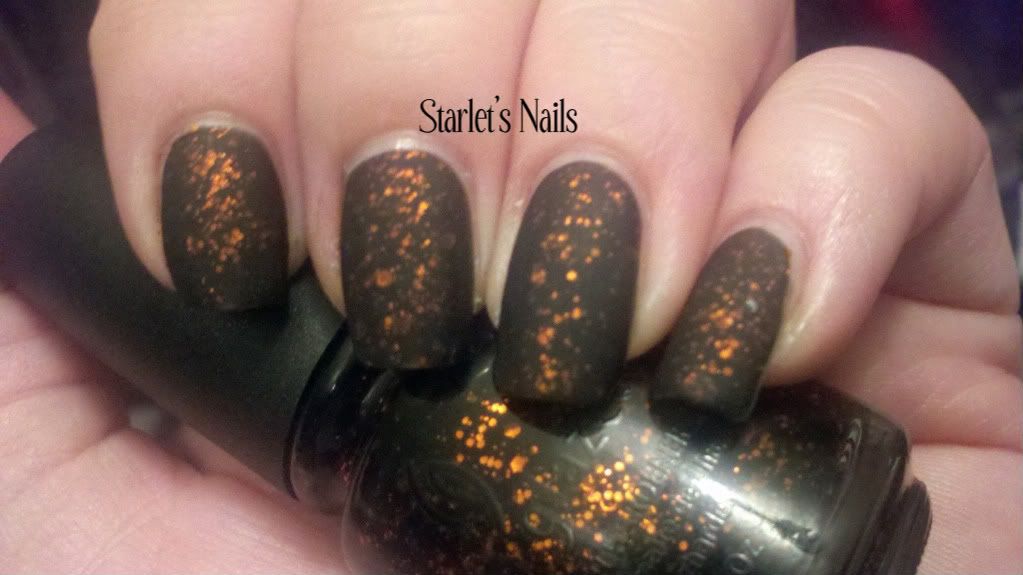
Today's NOTD is China Glaze Fortune Teller. I originally missed out on this beauty because it was released back in 2009 right before my polish addiction started and before I learned my lesson about limited edition products. I was lucky enough to get my hands on it. The picture shown is one coat of China Glaze Liquid Leather ( my go to black) and one coat of Fortune Teller. I used Liquid Leather as a base because I want to get the most out of my bottle of Fortune Teller. Fortune Teller would be opaque in two coats but with HTF polishes I prefer to layer them over a base color. I added China Glaze Matte Magic top coat and to me it looks like lava.
NOTD: Revlon Devil's Lure
Hello Everyone!
The NOTD I have for you today is Revlon Devil's Lure from Revlon's Masquerade collection. I don't generally read for reds or any kind but a vampy jelly red? Now that has my name written all over it! I was surprised to love this polish as much as I do. In the bottle it looks like just another vampy red, but 2-3 coats on the nail and you have the shiniest, vampy jelly with so much depth. Simply gorgeous. Just goes to show you can't always trust what you see in the bottle.
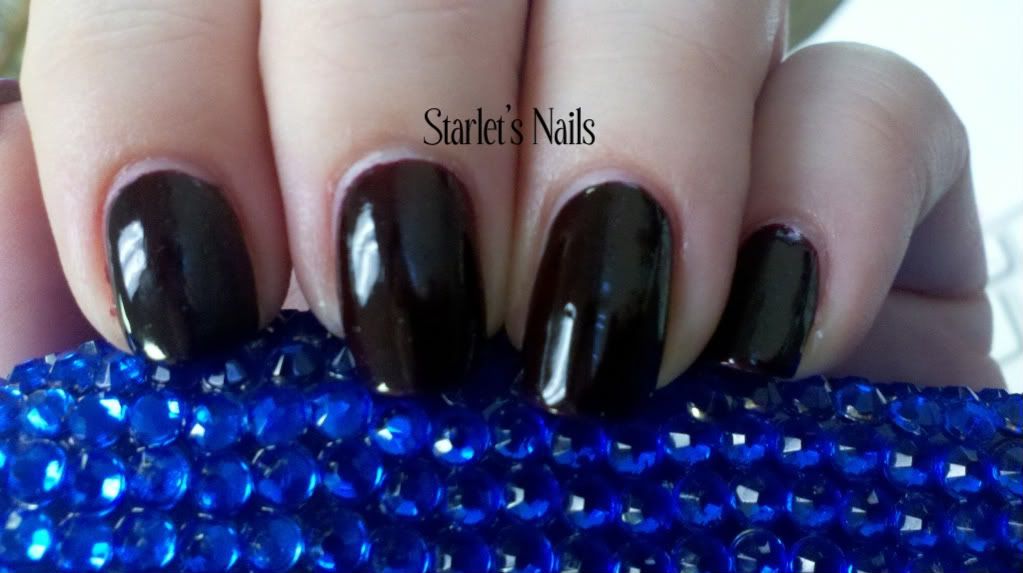
Recently I've been very impressed by Revlon. They're putting out some incredibly unique polishes. Now if only they'd re-release the StreetWears. I picked up Devil's Lure at my local grocery store. I've seen the Masquerade collection at Walgreens and I'm sure you can pick it up most places Revlon is sold.
The NOTD I have for you today is Revlon Devil's Lure from Revlon's Masquerade collection. I don't generally read for reds or any kind but a vampy jelly red? Now that has my name written all over it! I was surprised to love this polish as much as I do. In the bottle it looks like just another vampy red, but 2-3 coats on the nail and you have the shiniest, vampy jelly with so much depth. Simply gorgeous. Just goes to show you can't always trust what you see in the bottle.
Recently I've been very impressed by Revlon. They're putting out some incredibly unique polishes. Now if only they'd re-release the StreetWears. I picked up Devil's Lure at my local grocery store. I've seen the Masquerade collection at Walgreens and I'm sure you can pick it up most places Revlon is sold.
NOTD: Tangled In My Web Gradient
Hello everyone!
I hope you all enjoyed your weekend. Today's NOTD is a glitter gradient using Wet n' Wild French White Creme and the new (nearly impossible to find)Wet n' Wild Tangled In My Web from the On The Prowl Collection.
To create this effect I first applied my base coat (CND Stickey) and two coats of Wet n' Wild French White Creme and let it dry completely. I then added one light coat of Tangled In My Web which is pretty sparse to begin with. I then added another coat of Tangled In My Web but this time to only half my nail. I then added one more coat of Tangled In My Web to just the tips of my nails. I added two generous coats of China Glaze Fast Forward quick dry top coat.
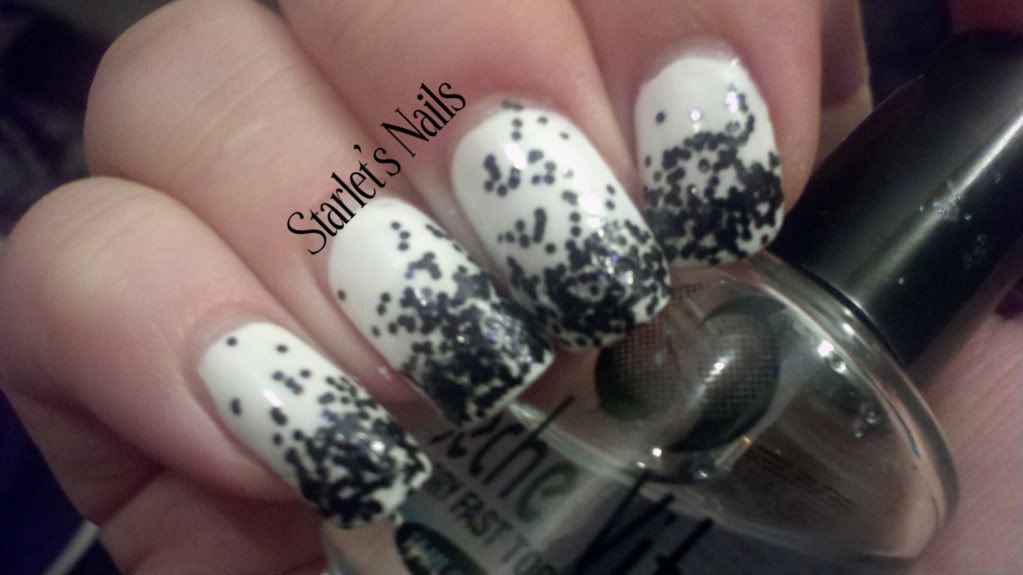
I'm a sucker for black and white combinations. In fact the majority of my house is decorated in black and white. I'm completely in love with Tangled In My Web. I found the On The Prowl display at my local CVS. If you see the display do not hesitate to pick up a few, they're less than $2! Nice job Wet n' Wild! I'm very impressed.
I hope you all enjoyed your weekend. Today's NOTD is a glitter gradient using Wet n' Wild French White Creme and the new (nearly impossible to find)Wet n' Wild Tangled In My Web from the On The Prowl Collection.
To create this effect I first applied my base coat (CND Stickey) and two coats of Wet n' Wild French White Creme and let it dry completely. I then added one light coat of Tangled In My Web which is pretty sparse to begin with. I then added another coat of Tangled In My Web but this time to only half my nail. I then added one more coat of Tangled In My Web to just the tips of my nails. I added two generous coats of China Glaze Fast Forward quick dry top coat.
I'm a sucker for black and white combinations. In fact the majority of my house is decorated in black and white. I'm completely in love with Tangled In My Web. I found the On The Prowl display at my local CVS. If you see the display do not hesitate to pick up a few, they're less than $2! Nice job Wet n' Wild! I'm very impressed.
Thursday, October 13, 2011
Look At What I Found: Sally Hansen Salon Effects Limited Edition Holiday Collection
Hello everyone!
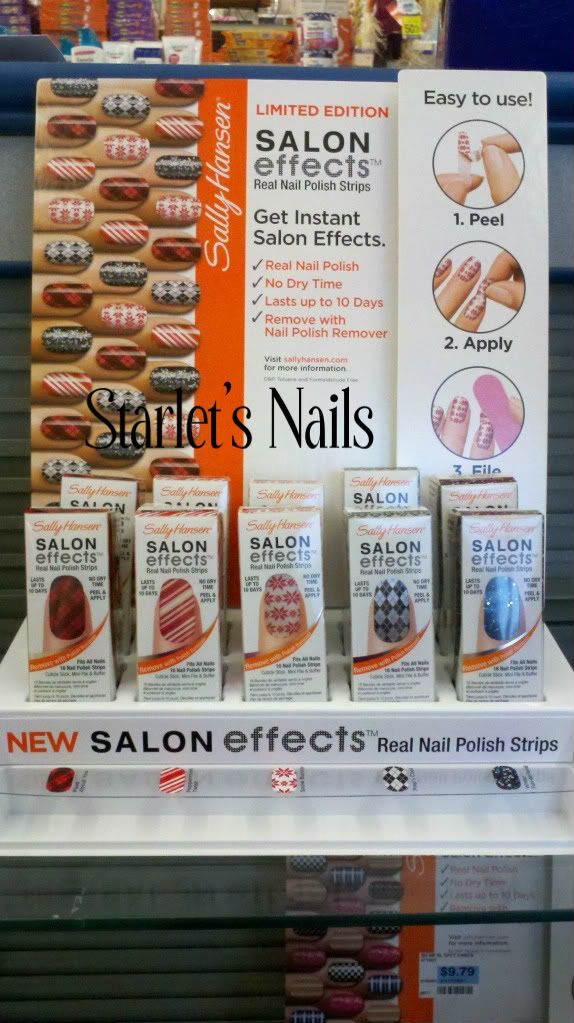
Today I do not have swatches for you (boooo! *throws tomato at self*) but I do have a bunch of pictures ( have I redeemed myself?) for you of the new Sally Hansen Salon Effects for the holiday season. Let me just say I am absolutely, head over heels in love with these designs. I grew up in the 90's when grunge was very popular so anything plaid reminds me of grunge. I also love cozy winter/fall clothes and plaid is cozy. Enough blabbing and on the the pictures!
This is what the entire display looks like:
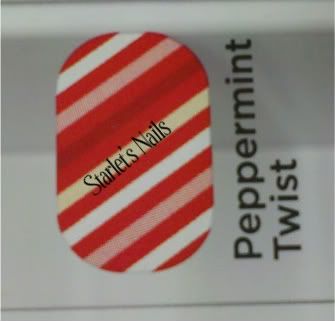
 And here are the designs:
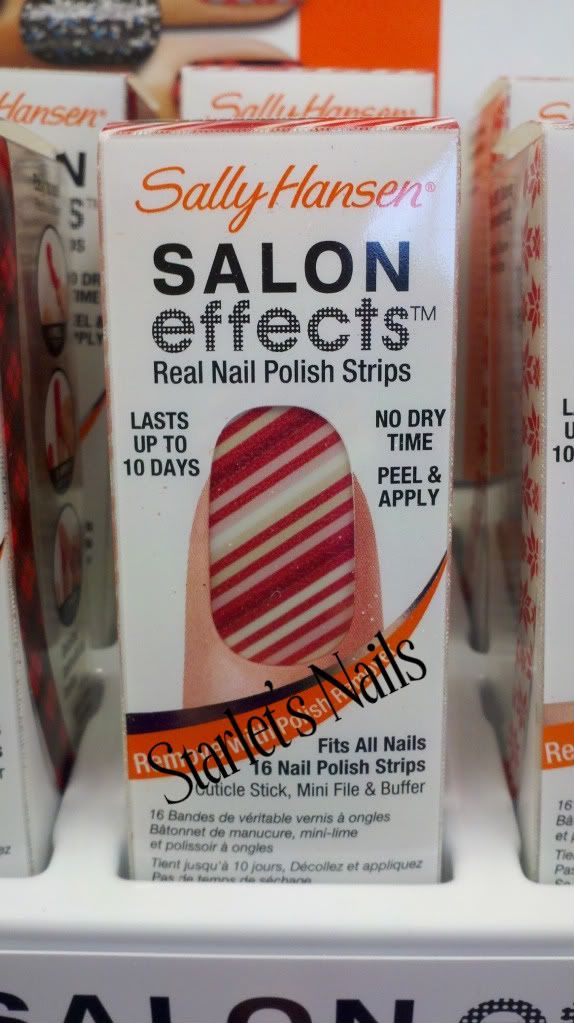

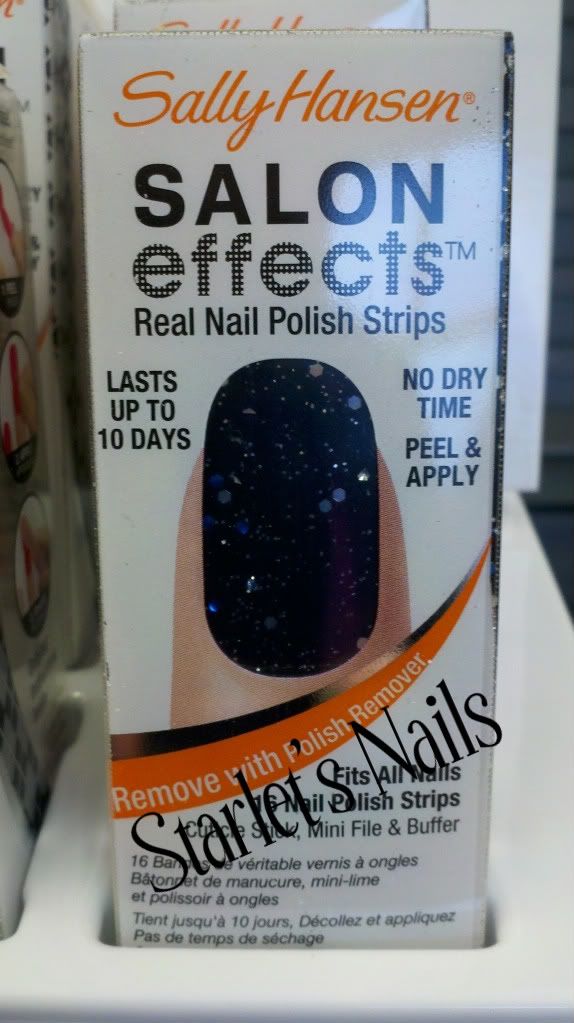
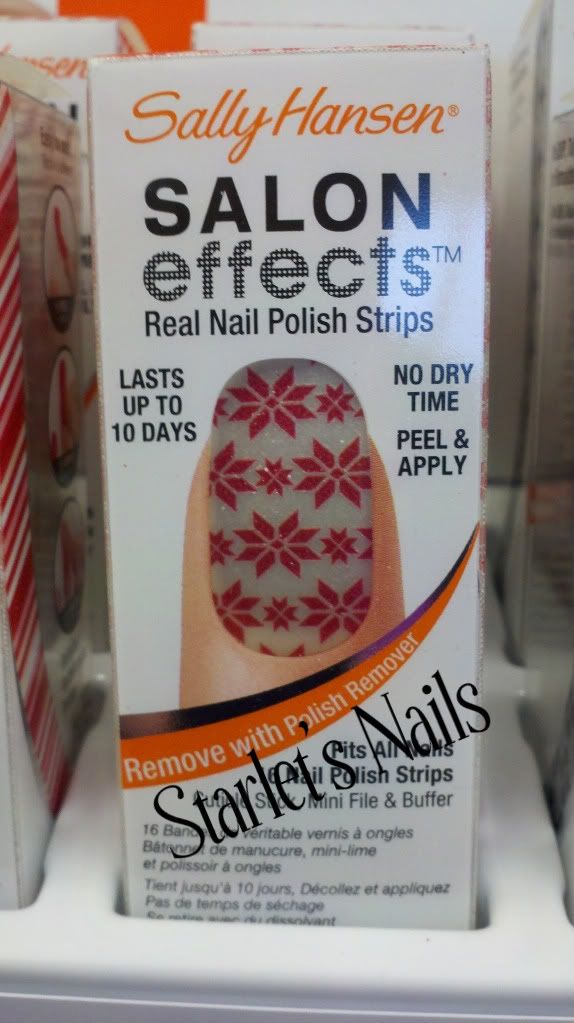
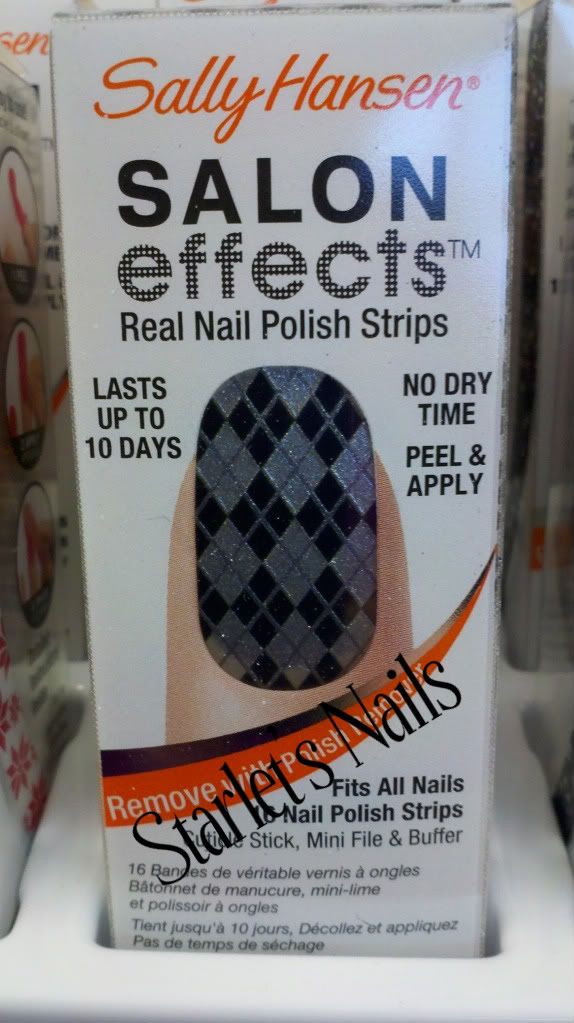
 Sally Hansen Salon Effects polish strips can be purchased anywhere Sally Hansen products are sold. The designs in this post are Limited Edition. They retail for about $7-$9. I found this Limited Edition display at Rite Aid.
Curious about wear time? Check out my Sally Hansen Salon Effects wear test.
Today I do not have swatches for you (boooo! *throws tomato at self*) but I do have a bunch of pictures ( have I redeemed myself?) for you of the new Sally Hansen Salon Effects for the holiday season. Let me just say I am absolutely, head over heels in love with these designs. I grew up in the 90's when grunge was very popular so anything plaid reminds me of grunge. I also love cozy winter/fall clothes and plaid is cozy. Enough blabbing and on the the pictures!
This is what the entire display looks like:
Peppermint Twist
And a close up of the swatch on the display:
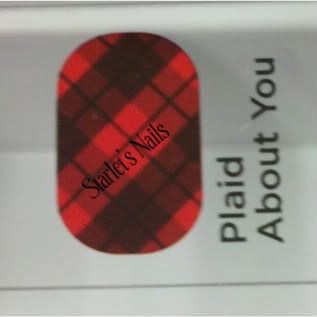
Plaid About You (This name kills me! I love it!)
And a close up of the display swatch
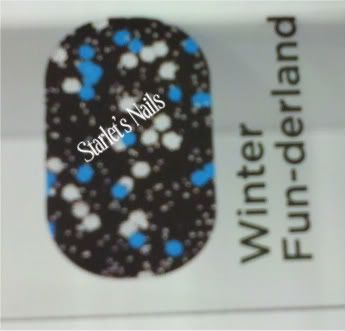
Winter Fun-derland
And the display swatch
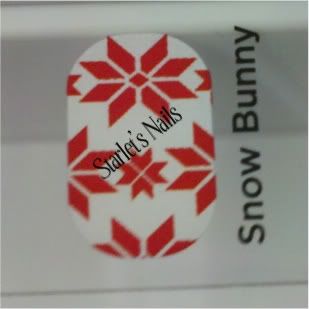
Snow Bunny
And a close up of the swatch
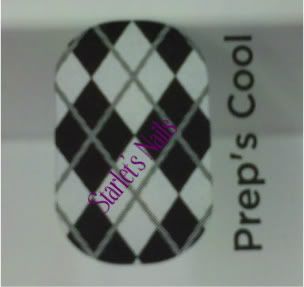
(My Favorite!!!) Prep's Cool
A Close up of the swatch
Curious about wear time? Check out my Sally Hansen Salon Effects wear test.
Sally Hansen Salon Effects Wear Test
Hello everyone!
Today I have a wear test for you. About a month ago I met some really awesome nail obsessed ladies. we met for lunch & had a HUGE polish swap. My dear friend Evelyn gave me these Sally Hansen Salon Effects. I've been wanting to try them because my husband and I are going on vacation for two weeks and I don't want to have to do my nails everyday while on vacation. I immediately thought of these polish strips. Luckily, I received some in a swap and I got to try them out.
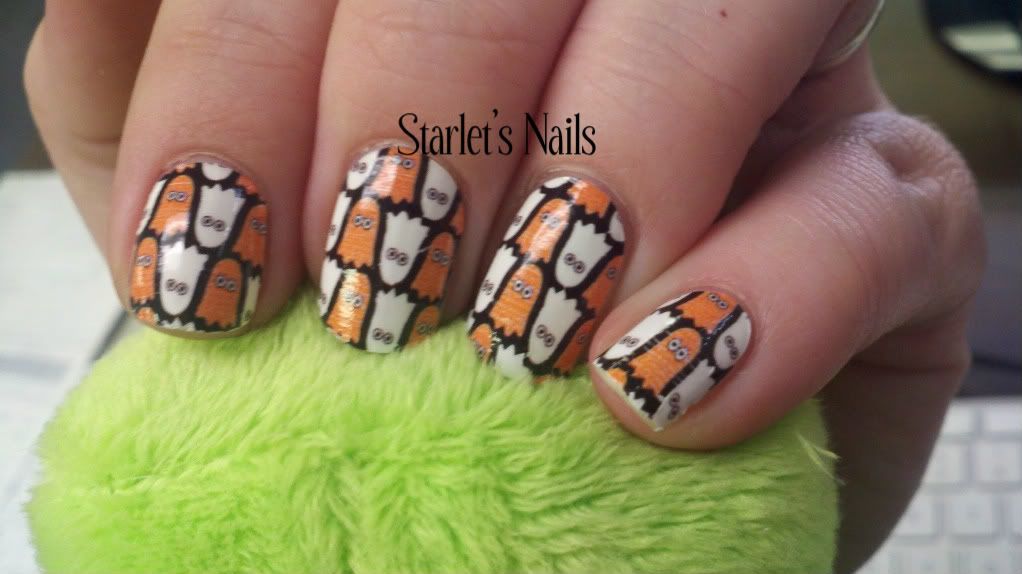
I got the little ghost strips. I think they're adorable. One person commented that they look like the pacman ghosts.


Today I have a wear test for you. About a month ago I met some really awesome nail obsessed ladies. we met for lunch & had a HUGE polish swap. My dear friend Evelyn gave me these Sally Hansen Salon Effects. I've been wanting to try them because my husband and I are going on vacation for two weeks and I don't want to have to do my nails everyday while on vacation. I immediately thought of these polish strips. Luckily, I received some in a swap and I got to try them out.
I got the little ghost strips. I think they're adorable. One person commented that they look like the pacman ghosts.
Oh by the way- this is Joey. He has decided to jump on my lap while I sit here and type this Blog post. I guess he wants to say hi to everyone.
So, as I type AROUND the cat.... where was I? Oh, these polish strips were Limited Edition for Halloween. You can find them anywhere Sally Hansen is sold. they retail for around $7-$9 I did not find them difficult to apply, although I did have to cut a few strips to get a perfect fit. The most difficult thing about applying the strips is getting the initial placement right and lining them up straight on your nail. I did not use a base coat, but I did add a coat (or two) of Barielle Ultra Speed Dry Manicure Extender. Here is a pic of the strips immediately after they'd been applied.
You can see i didn't have a perfect application. There are a few wrinkles and I stretched the pinky one too far. I'll chalk that up to being a first time user. I will say that after I added the top coat those edges smoothed down a little for me and I wasn't as worried about them peeling up.
And here they are on day five. Major tipwear(for me), and they're black so it's even more noticeable.
I'm generally a daily polish changer so it was like some kind of cruel & unusual punishment for me to keep these on my nails as long as I did. They lasted five days on me before the tipwear was driving me crazy and I had to remove them. I type a lot at my job so I think that was a big part of the tipwear. I also did dishes and baked some delicious goodies for my husband's work while wearing the strips. I feel like I put them through a fair test. I would purchase these in another design. There are a few in the holiday line I'm DYING to wear(Click here to see them). I think the second time around I'll have better results. There is a little bit of a learning curve with these strips, but all in all I think they're a great option for someone that doesn't want to worry about doing a manicure for a week (or longer).
Thursday, October 6, 2011
Wet n' Wild Juicy Lip Balm Review
Last time I was at my local drugstore I noticed the Wet n' Wild display looked a little different. I noticed these lip balms and I figured since winter (and chapped lips) is right around the corner I might as well give 'em a try. The flavors/scents they had were watermelon, strawberry, cherry, and raspberry. I picked up strawberry.
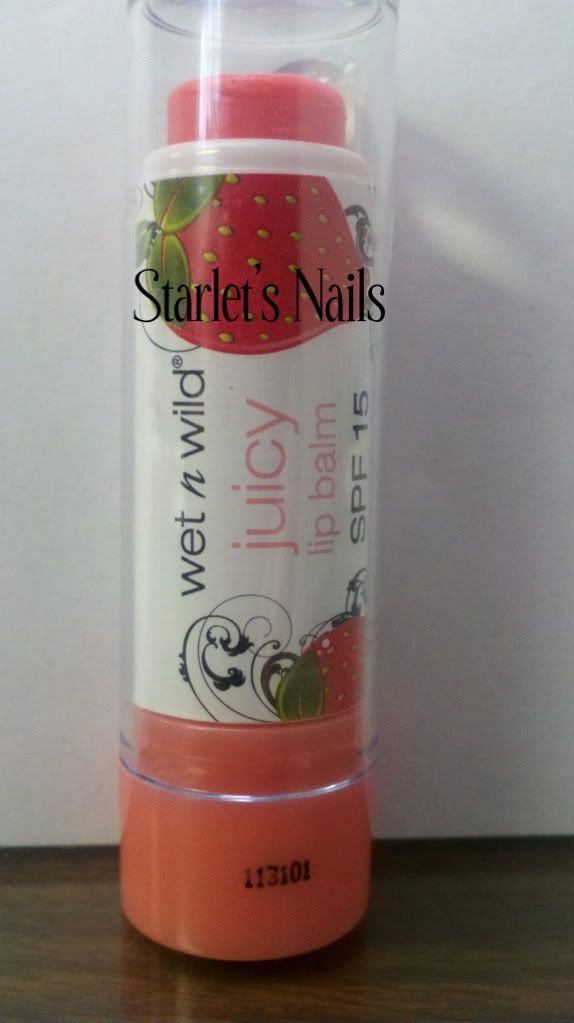
The packaging is really cute. I especially like the black flourishes. The balm is slightly tinted (as you'll see in my swatch below) but it's not tinted enough to really give much color to the lips. I have well pigmented lips so perhaps someone with less pigmented lips would see more of a color pay off. The scent of the balm is very nice and it feels very good on the lips. Now my problem with most balms is the taste. I do notice a strange taste with this balm. I think I will still use this balm as a moisturizing layer to put on under lipsticks or glosses but I do not believe I'll wear it alone. If you're interested in finding this balm check your local drugstores or anywhere that sells Wet n' Wild cosmetics. I purchased mine at CVS.
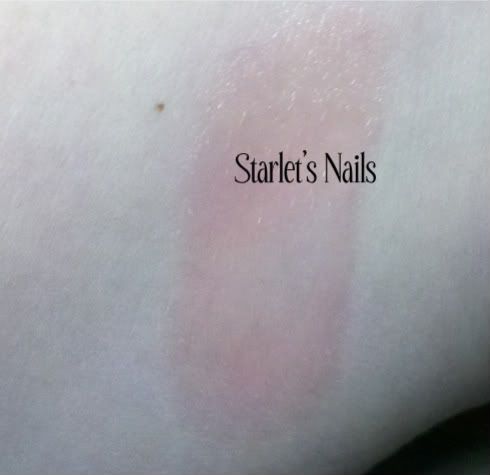
The packaging is really cute. I especially like the black flourishes. The balm is slightly tinted (as you'll see in my swatch below) but it's not tinted enough to really give much color to the lips. I have well pigmented lips so perhaps someone with less pigmented lips would see more of a color pay off. The scent of the balm is very nice and it feels very good on the lips. Now my problem with most balms is the taste. I do notice a strange taste with this balm. I think I will still use this balm as a moisturizing layer to put on under lipsticks or glosses but I do not believe I'll wear it alone. If you're interested in finding this balm check your local drugstores or anywhere that sells Wet n' Wild cosmetics. I purchased mine at CVS.
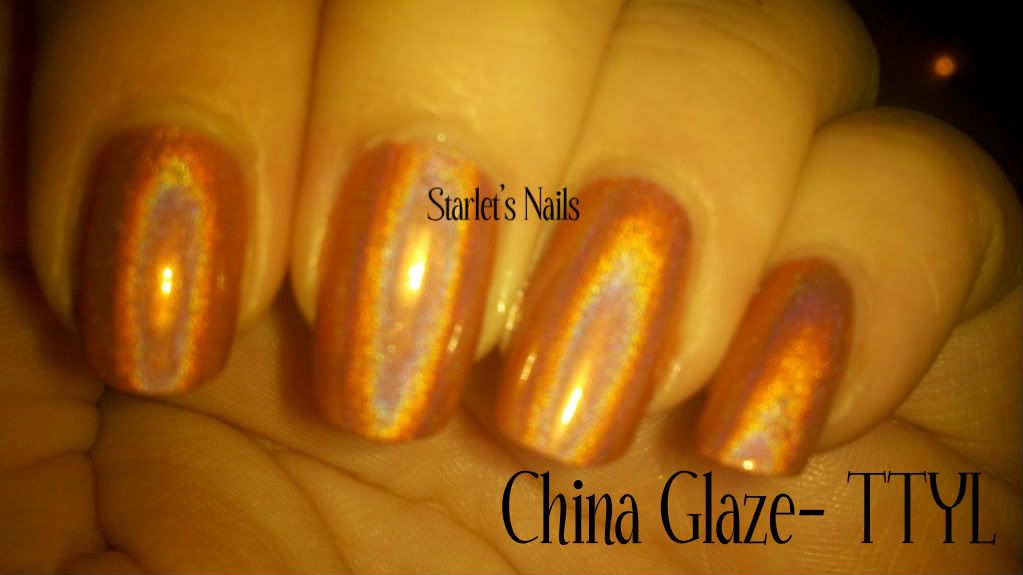
NOTD: China Glaze TTYL
Today's NOTD is China Glaze TTYL from the OMG collection that was released in 2008. TTYL is a peach toned linear holo. I rather like it because indoors the holo effect isn't "BAM-in-your-face" holo so if you happen to work in a conservative office you could still get away with wearing TTYL. Picture shown was taken with a flash (it was night) to coax the lovely holo to show herself. My skin tone isn't really that yellow.
Subscribe to:
Posts (Atom)