Tuesday, September 27, 2011
NOTD: Nebulae Nails
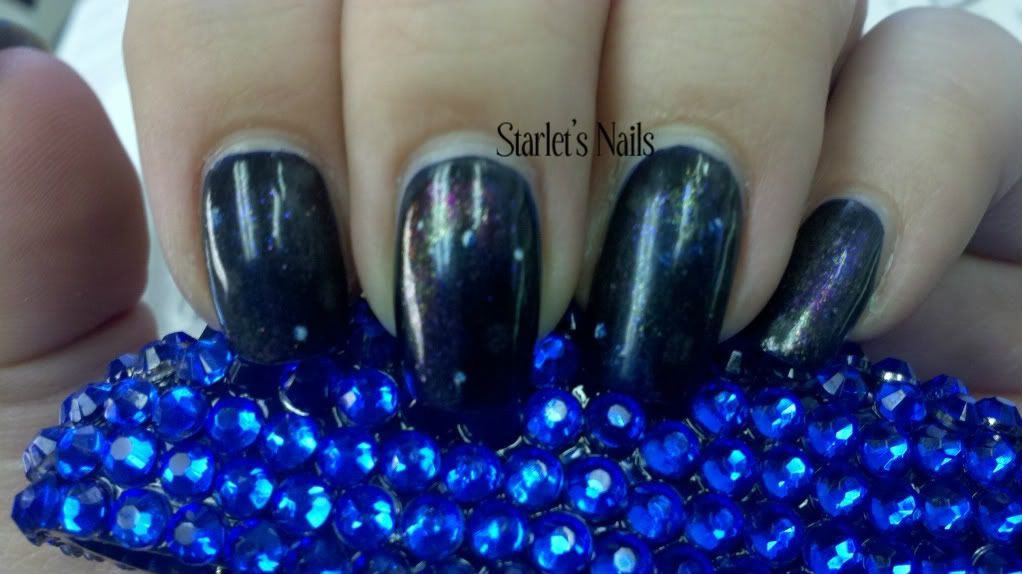
Today I'm going to show you a bit of nail art. Now you may think nail art is difficult and should be left to the professionals but that is simply not true. Nail art can be easy. This nail art was so simple. All you need is a base color, I used Wet n' Wild Nocturnal. After you paint your nails with your base color you simply sponge on the other colors. Nebulae can be all different colors. For my nebulae I used Orly Out Of This World, Orly Lunar Eclipse, Zoya Valerie, and Zoya Edyta. I took a plain makeup sponge and ripped it in half to give the edge I was going to use for stamping more texture. If you don't rip the sponge you'll end up stamping with a flat edge and you won't get the soft "fluffy" look of a nebula. Using one color at a time I dropped a few drops of polish on a paper plate (do no use a Styrofoam plate! The polish will "eat" the Styrofoam) and dipped the ripped edge of the sponge in the polish. I dabbed off a bit of the polish to make sure I didn't end up with a huge blob on my nails. Then I lightly pounced the polish with the sponge on my nail. I did not completely cover the nail, I just added a little of each color but pouncing the color on with the ripped edge of the sponge. If you think you've added too much of the nebulae colors you can lightly go over the nail with the sponge and a bit more of your base color. Once you get the look you're going for you can add a few stars like I didn't. For the stars I just used a toothpick dipped in a small amount of Wet n' Wild French White Creme. I added a coat of Seche Vite top coat and there you have it... Nebulae nails. I love this look and it's so simple. The next time I do this look I think I might add a little bit of holo glitter.
Subscribe to:
Post Comments (Atom)
So pretty! I have been meaning to try one of these manicures, I think it will be perfect for Halloween season!
ReplyDelete@Jacqui- I'd love to see your version
ReplyDelete