Thursday, September 29, 2011

NOTD: Icing Lucky Luis & OPI Black Shatter

Today I have another crackle/ Shatter mani for you. What can I say? It's nail art that anyone can do. I remember back when Cover Girl came out with crackling polish. I remember thinking it as the coolest thing. It's fun for me to watch trends come and go and come back again. I must say the new version of the crackle/ shatter polishes is so much better than the old version. The old formula used to flake right off. It created a really cool pattern but I desperately needed a topcoat or else you'd find flakes of polish all over. I remember the old crackle polish was also nearly impossible to remove. I used to just pick at mine and make it flake off because I hated fighting with it. You practically needed a grinder to get the darn stuff off. Okay, maybe that's a slight exaggeration. My point is the formula on the new crackle polish is phenomenal. I have heard of some people having issues with it getting thick or "crumbly" in the bottle. It's always important with any polish to make sure you tighten the cap so it's completely closed. Please do not throw away your thickened "glue consistency" crackle polish (or any polish for that matter) is it safe to used Nail Polish thinner to rejuvenate thickened polish. It will not ruin your crackle polish. Please do not use nail polish remover or acetone to thin you polish ONLY USE NAIL POLISH THINNER.

The base color I used was from Icing. It's called Lucy Luis. Lucky Luis is a spring green jelly. It's a lovely polish but after I applied four coats I still had a very noticeable visible nail line. A lot of people are not bothered by this but I didn't like it with this color so I added OPI Black Shatter.

Wednesday, September 28, 2011

NOTD: China Glaze Shower Together & China Glaze Broken Medallion

Today's NOTD (Nails Of The Day) is a crackle mani. I used China Glaze Shower Together as my base color and China Glaze Broken Medallion crackle polish. I'm not generally a fan of gold colors for anything really but since Broken Medallion leans very copper I absolutely love the contrast between these two polishes. I Know a lot of you are sick of crackle/shatter manis but I still love them. I think it's all about finding new and interesting color combinations.

Tuesday, September 27, 2011

NOTD: Nebulae Nails

Today I'm going to show you a bit of nail art. Now you may think nail art is difficult and should be left to the professionals but that is simply not true. Nail art can be easy. This nail art was so simple. All you need is a base color, I used Wet n' Wild Nocturnal. After you paint your nails with your base color you simply sponge on the other colors. Nebulae can be all different colors. For my nebulae I used Orly Out Of This World, Orly Lunar Eclipse, Zoya Valerie, and Zoya Edyta. I took a plain makeup sponge and ripped it in half to give the edge I was going to use for stamping more texture. If you don't rip the sponge you'll end up stamping with a flat edge and you won't get the soft "fluffy" look of a nebula. Using one color at a time I dropped a few drops of polish on a paper plate (do no use a Styrofoam plate! The polish will "eat" the Styrofoam) and dipped the ripped edge of the sponge in the polish. I dabbed off a bit of the polish to make sure I didn't end up with a huge blob on my nails.  Then I lightly pounced the polish with the sponge on my nail. I did not completely cover the nail, I just added a little of each color but pouncing the color on with the ripped edge of the sponge. If you think you've added too much of the nebulae colors you can lightly go over the nail with the sponge and a bit more of your base color.  Once you get the look you're going for you can add a few stars like I didn't. For the stars I just used a toothpick dipped in a small amount of Wet n' Wild French White Creme. I added a coat of Seche Vite top coat and there you have it... Nebulae nails. I love this look and it's so simple. The next time I do this look I think I might add a little bit of holo glitter.

Thursday, September 22, 2011

Sally Hansen Extreme Wear Night Lights

First of all please excuse my tip wear. I made spiced pumpkin syrup from scratch last night after I did my nails which trashed my mani. Cutting up pumpkins is not a mani friendly activity. Anyways, on to the polish...

Sally Hansen Xtreme Wear Night Lights. Night Lights is a sheer charcoal jelly base loaded with wonderfully sparkly holo glitter. The picture shown is one coat of Night Lights over two coats of China Glaze Liquid Leather. Liquid leather is a semi jell black polish.  I adore Liquid Leather. It is my favorite black polish. It dries incredibly shiny even without top coat. I decided to layer Night Lights over Liquid Leather because I thought the darkness and opacity of Liquid Leather would really make the lovely holo glitter in Night Light pop. As you can see in the pic, each individual jewel of holo glitter is screaming for your attention. It's even more stunning in person. No comps this time because I do not have anything that would hold a candle to Night Lights. Truly a polish to make any polish junkie speechless.

OPI Designer Series Jewel Swatches & Comps

OPI Designer Series Jewel. Jewel is a goregeous polish. It is a duochrome. Depending on what lighting I'm in I see a heavily red based purple with cranberry shimmer, a cranberry base with coordinating shimmer, or a rich bronzey brown with cranberry shimmer. At the right angles, I can even see pink shimmer. I could not stop looking at this polish yesterday. I kept tilting my hand at different angles in the light to make the different colors come out. Jewel reminds me of the leaves changing on a red leafed maple tree, perfect for the Autumn mood I've been in


OPI Designer Series Jewel Comps. I had a heck of a time trying to find a polish to compare this too.  Jewel is really unique in my collection. I tried to comp the most prevalent base color, the rich bronzey cranberry color. Essie It's Genius on index and ring, OPI DS Jewel on middle and pinky. Not even close. Now I do think Jewel may be close to OPI Canadian Maple Leaf, but I do not own it so I cannot say for sure.

Wednesday, September 21, 2011

Look At What I Found: Jesse's Girl JulieG Collection

No swatches this time. I just want to share with you what the display looked like in case you're looking for it.  I found this display at Rite Aid. All the colors look fantastic. Well done JulieG!

Tuesday, September 20, 2011

Borghese Rapido Castello Blue Swatches & Comps


Castello Blue. I originally picked this color up because it reminded me of a Wedgwood necklace I have. It also reminded me of a gloomy sky. Castello Blue is a light toned dusty blue. Not "baby blue" by any means but still soft and delicate but with a small shot of grey that makes it a little edgy. I had no problems with application and dry time was a cinch. Picture shown is two coats.

Castello Blue comps. Index and ring finger are Castello Blue. Middle and pinky are Sally Hansen Complete Salon Manicure Gray by Gray. This picture is two coats of each polish. Gray by Gray was the closest shade I had to Castello Blue and while they have their similarities they are not even close to being dupes.

How To Build Your Own Polish Rack/ Shelf

Hi everyone!

A while back, when my stash was small, I decided I wanted to display my stash. I looked all over and could only find wall racks that were expensive. I believe for one rack it was $80 shipped. I was not going to pay that much for a bunch of plastic. I decided I'm a smart girl I can figure out how to build my own wall racks. I had shop class in school. I'm capable. All the materials cost me around $20.

This is honestly a very simple project. I wouldn't say I'm handy at all.

Lets get started.


Please make sure to follow all safety precautions, wear a mask, you don't want to breathe in saw dust. Also please make sure you wear safety glasses. Yeah you'll look like a dork but you'll be a dork that doesn't have saw dust in her eyes :)


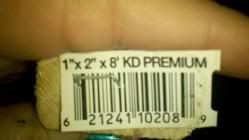
For all my wall racks I used three 1"x2"x8'


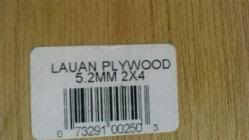
I also used a sheet of 5.2mm 2'x4' lauan plywood


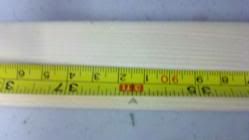
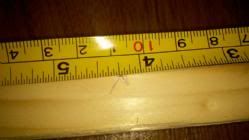
You want to start with the 1x2's and cut 2 pieces the length you want them to be for how tall your wall rack will be. I will be honest, math is NOT my strong point so I like to use simple numbers. I chose to make my wall rack 36" tall. Then you need to decide how wide you want the wall rack to be. I wanted mine to be 21.5" wide BUT you need to subtract the width of the 2 1x2's so 21.5" - 1.5 " (each 1x2 is .75" wide) this will ensure your wall rack comes out to be the right size. My shelves will each be 20" long.  To clarify I cut two pieces to 36" and nine pieces to 20".


please be careful when using power tools!!!


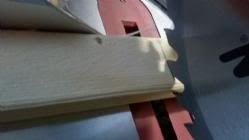
Now you'll need to assemble your top, bottom. and sides. You'll lay the sides down first then slide the top in between the sides. you'll want the 2" side to be the depth of the wall rack, so the 1" side will be facing towards you. Nail or screw the top and the bottom into place.

you just built yourself a rectangle :D

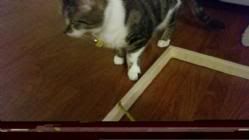
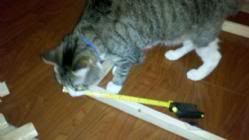
Inspector Jeffery says it's looking good


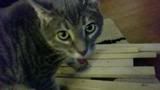
Material Manager Jaxie guards the pieces that will become shelves


Project Manager Joey says measure twice, cut once


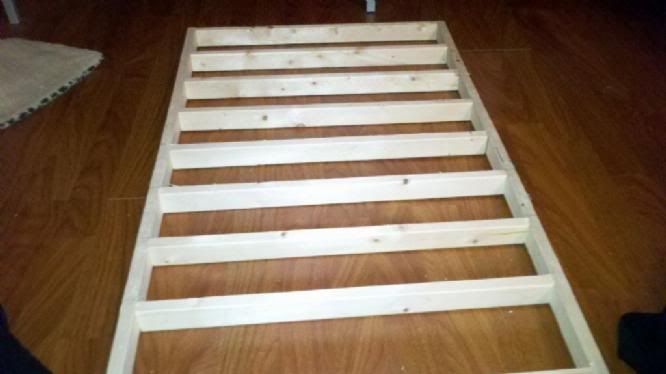
Next you want to measure out the placement for the shelves. I didn't care too much about them being totally even. In fact I like having the top or bottom shelf a little larger in case I need to store and odd sized polishes. I chose to make my shelves 4.25" apart measuring from the bottom of the wall rack I made a mark at 4.25"


 I marked on both sides of the wall rack and used a level to make sure it was even. I then nailed the shelf into place using two 1 5/8" nails on each side. I then measured 4.25" from the bottom of that shelf to make the place for the next shelf. I continued nailing shelves into place.

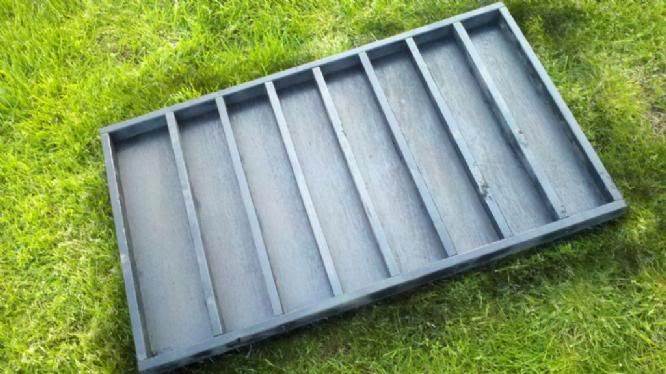
Here's what it looks like with all the shelves in place


You're almost done!

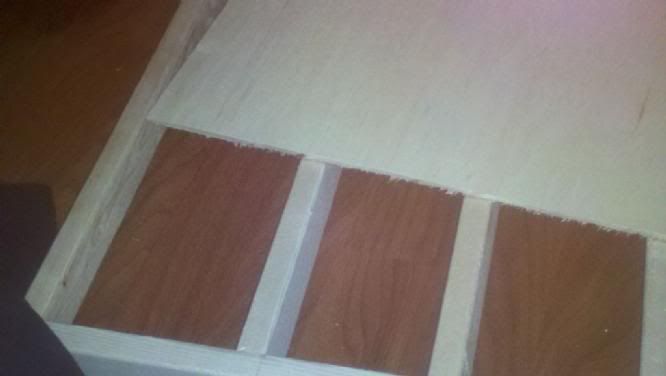
The next step is to cut the lauan plywood to size for the backing. I have found the easiest way to do this is to lay the rack on top of the plywood, make sure the sides are flush to the edge of the rack and use a pencil to mark where you're going to cut. Using a table saw I cut the plywood. I sanded the edges just so they weren't sharp then I nailed the plywood to the back of the rack. This will make it more sturdy.


I took the rack outside a spray painted it. You could cover the back with fabric and paint just the rack part then assemble the rack to the back if you'd like.


I let the painted wall rack dry for two days in the garage so my house didn't smell like spray paint. Then i hung it up. Make sure you drill into wall studs. polish is very heavy and you need the support of the studs to hold the weight. If you cannot drill into studs make sure you use wall anchors.

you just built your very own polish rack! Now fill it up will all your pretties!

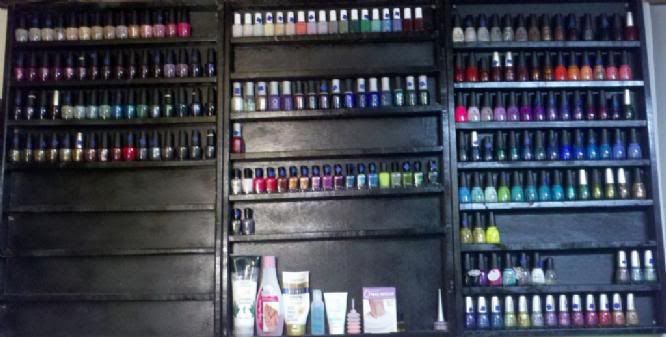
I currently have three wall racks. Here is a picture of them

 on the left is all OPIs. The middle top shelf is Essie, below that are my Orlys and below the Orlys are my Zoyas. The Rack to the right is all China Glaze.


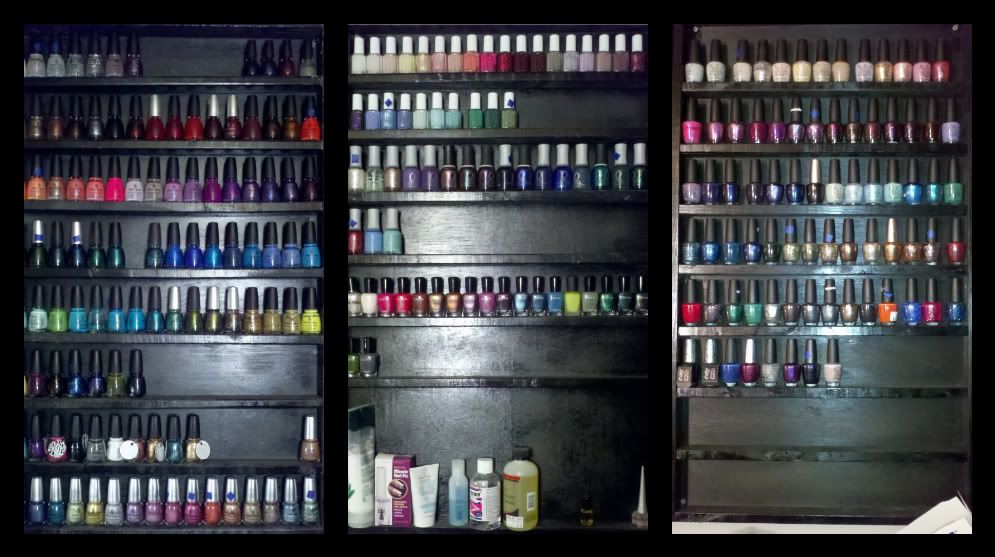
Here is the most recent picture of the racks. You can see I've reorganized the bottles. It's all about finding what works for you.


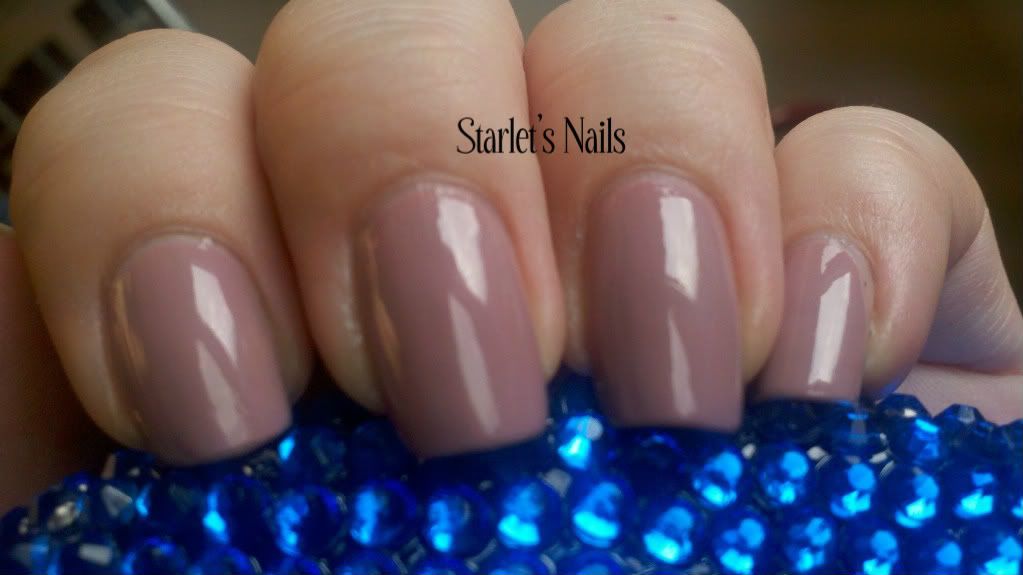
If you're wondering what all the blue squares are on the handles, that's how I keep track of my untrieds. Each untried has a little piece of blue painters tape on the handle that way when I'm deciding on a color I know which I haven't worn. After I've done a mani with that color I simply peel the tape off. I'm currently trying to work through my untrieds and I've found this method to be very helpful.

I hope you enjoyed this tutorial. Please feel free to ask me any questions you may have :)

Monday, September 19, 2011

Essie Lady Like Swatch & Comps


Essie Lady Like is From the fall 2011 collection. Lady Like a soft dusty pink creme. It reminds me of a flower petal. It also reminds me of a mauve/pink clutch my grandmother owned. I'm oddly drawn to these types of colors. I really didn't like Lady Like when I first put it on, but as I wore it through today it really grew on me. I think I'll wear Lady Like as a pedicure next time.


Essie Lady Like on ring, OPI Parlez Vous OPI? on middle, Essie Demure Vixen on ring, Wet N' Wild Heartbroken on pink. These were all the colors I thought could be dupes for Lady Like but as you can see they're not as closed as I thought they were. Demure Vixen is obviously the closest, but Demure Vixen has shimmer and is slightly more beige on color than Lady Like is. Definitely not dupes.

Sunday, September 18, 2011

China Glaze Metro Swatches & Comps

Ahh it's finally Autumn! This is my favorite season. Cool, crisp air; warm cozy sweaters; changing leaves; pumpkins; Halloween; haunted houses, and horror movies. The thing I love the most about fall is the smell of the grapes. I love the smell of the grapes. If my husband and I ever move I want to live next to a vineyard just so I can smell the grapes every fall. Oh, and being walking distance to amazing wine wouldn't be a bad thing either. Anyways, on the the polish, because well that's why you're here.


Urban Nights is a red based vampy purple. I never get tired of seeing these vampy colors for fall. I just love them.


Skyscraper is the polish I was most excited about. It's a dusty navy jelly base with silver glitter. Very pretty. I have not worn this as a full mani and now that I'm looking at this pictures I'm wondering "why the heck haven't I worn this? It's gorgeous!"


Midtown Magic is a polish that I thought was going to be just another brown shimmer but oh man was i ever wrong. Midtown Magic has a purple/brown base with multicolored shimmer. I see gold and yellowish green shimmer. I was very surprised by this polish. I'm very glad I picked it up.


Westside Warrior was another polish I was very excited about. I have a weakness for green polish. I have an even bigger weakness for army green/ olive green polishes. I have a huge weakness for dusty/murky/muted colors. Needless to say... I was powerless against this polish. I feel like China Glaze stole this color from my brain. How China Glaze? How did you get in my brain and combine three of my weaknesses into one polish?


CG In the City is a very fine multicolored glitter. To me the best part is the black glitter. This picture is three coats and it's still a little sparse for my taste. I am a fan of these fine glitters. I find that the removal is very easy. I do not like to wrestle my polish off my nails.


I am on a never ending quest to not own dupes so I thought I'd share a few comps I did.


Urban Night Comps. Urban Night on Index, Sally Hansen Xtreme Wear Plum Burst on middle, LA Colors Phenomenon on ring.


Sky Scraper Comps. Skyscraper on index & middle, China Glaze Dorothy Who? on ring & pinky


Midtown Magic Comps. Midtown Magic on index& pinky. OPI Holiday Glow on middle. OPI Merry Midnight on ring.


Westside Warrior Comps. Westside Warrior on index. Rescue Beauty Lounge No More War on middle. Zoya Gemma on ring, Zoya Shawn on pinky


I hope you enjoyed my watches & comps.

Welcome!

Welcome everyone to my new blog. This is something I’ve wanted to do for a long time. I have been fascinated with nail polish for about 3 years now. I knew I was hooked when I saw Sally Hansen’s Hidden Treasure. Hidden Treasure was the first polish that made me think, “Oh my goodness I need to have that”. Hidden Treasure was also the first polish I actively searched for. I finally found it at Walgreen’s. I remember being so excited. It was the last bottle. About $8 was the most I had spent on a polish at that time. When I was new to this hobby I had to really love something to spend more than $5 for a bottle. Of course as I discovered more and more brands and higher end brands that $5 ceiling went out the window. With that being said, I would like to clarify I am not saying that just because something is more expensive it means its better. I have certainly learned that lesson the difficult way. I have always loved to shop and in a way my polish hobby just feeds into that. I have always loved color, and unique color combinations. I’ll be showing you a few of those color combinations in later entries.

Now I am not all polish all the time. I enjoy ceramics. When I discovered the potter’s wheel in high school I thought it was the coolest thing to be able to create something from what is basically mud. I also enjoy baking. The people around me enjoy that too because most of what I bake finds a new home somewhere else. I am not a nail tech but I am a licensed cosmetologist. I was a stylist for a few years. I loved my job but I didn’t find the right salon for me. I am not currently working in the field but I do hope to go back and find or create a place where I “fit”. When I was working in a salon my favorite thing to do was color. More specifically, I loved to do corrective color. “Corrective color” is just what it sounds like. When someone does a color service that does not turn out as planned and you use color theory to correct it. So you can see, color has always been a part of my life and that’s now I look at nail polish. Color can make you happy; can remind you of someone or something, it can speak for you. Above all color is gorgeous.

I hope you all enjoy this blog. A few things I have planned are:
  • Comparisons between different polish (are they a dupe? Are they not?)
  • New collections
  • NOTD (Nail Of The Day) pictures.
  • Tips and tricks I’ve picked up along the way
  • Reviews of products (which will ALWAYS be honest)

I hope you check back soon. I am very excited to take this journey, and I hope you’ll all join me for the ride.